
Support - Setup Email on Microsoft Outlook
- Outlook 2013 -> Click "File" tab > In the Info category, select Account Settings > Account Settings in the dropdown > On the Email tab, select New.
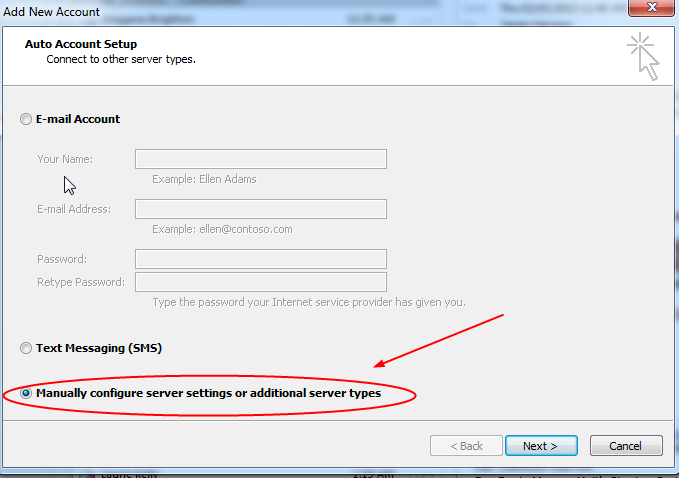
- Select "Manually configure server settings or additional server types" and click next
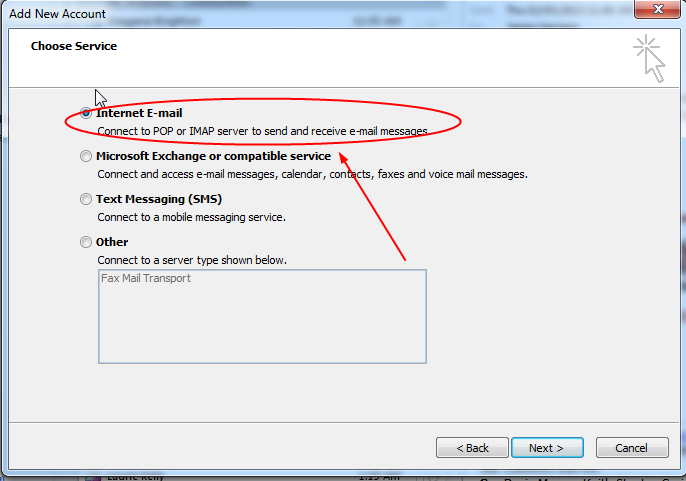
- Select "Internet E-mail"
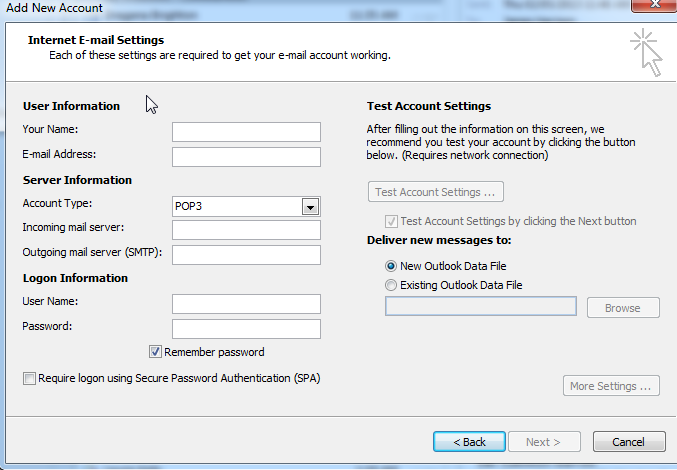
- Input information:
Your Name: Input whatever name you want this email account to display as
E-mail address: Input your complete address e.g. user@domain.com
Account Type: POP3 / IMAP. Both type are available. We recommend using IMAP if you will be connecting to the email account from multiple devices.
Incoming mail server: mail.realssl.com
Outgoing mail server: mail.realssl.com
User Name: Input your complete email address e.g. user@domain.com
Password: Input your account password
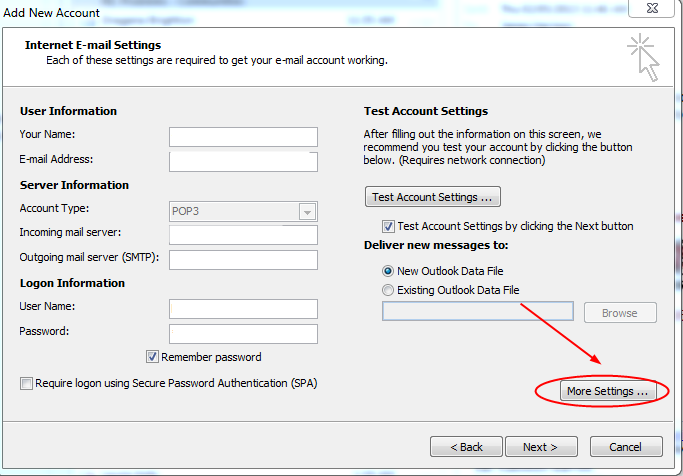
- Click "More settings..."
- Click "Outgoing server" tab and check the box for "My outgoing server (SMTP) requires authentication"
- Click "Advanced" tab
Select SSL in the encrypted connection dropdown for both incoming and outgoing.
Ports for SSL are:
995 -> POP
993 -> IMAP
465 -> SMTP
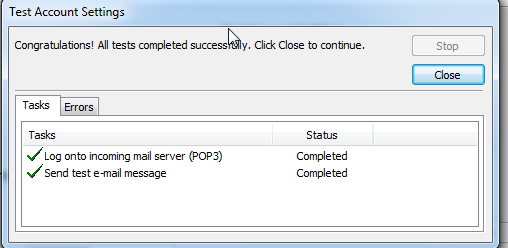
- Click OK and click Next on the "Internet E-mail settings" window. A test will run and if everything is configured correctly it will complete without errors.
Follow screenshots below
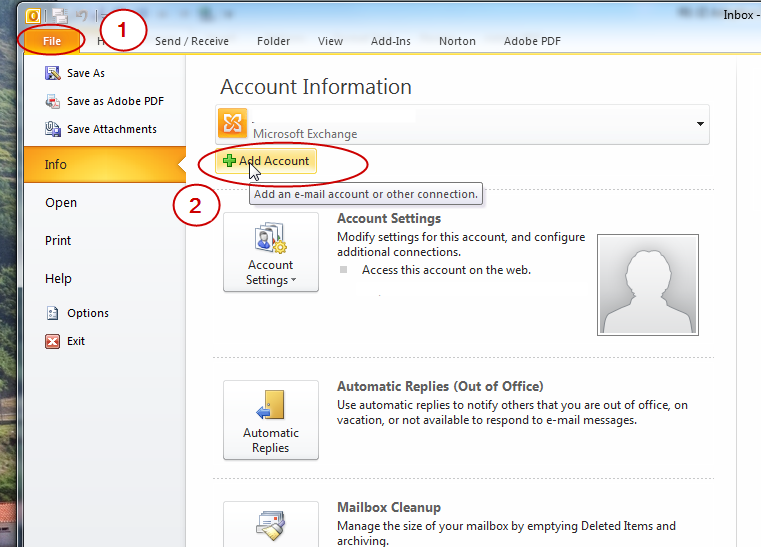
Open Outlook and select “File” then select Add Account
Select Manually configure server settings or additional server types
Select “Internet E-mail”
On the next page enter the following information (you will have been sent
the information specific to your account in a separate email)
User Information
Your Name: (The name you would like to appear on emails sent from you)
Email Address: your email address
Server Information
Account Type: POP3
Incoming Mail Server: mail.yourdomain.com
Outgoing Mail Server: mail.yourdomain.com
Login information
User Name: your email address
Password: your password
Setup Outgoing Server
**If you want to send email from this account this must be setup also**
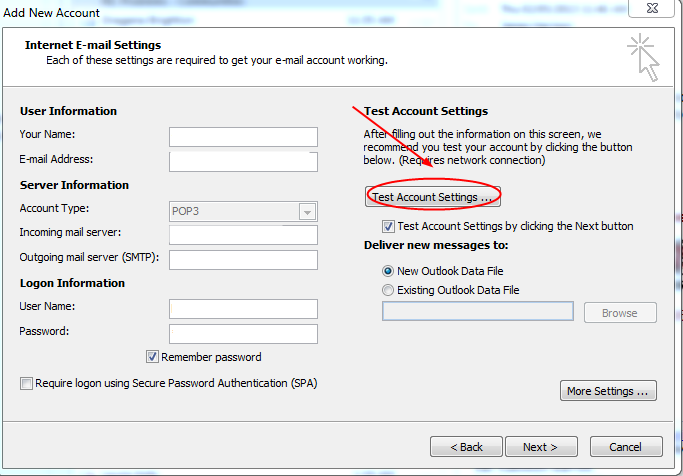
Click “More Settings”
In the popup click “Outgoing Server” and then click “ my outgoing server (SMTP) requires authentication” and
make sure “Use same settings as my incoming mail server”
is selected . The click “ok” to close the window

Your setup is complete. Click “Test Account Settings” to test
The screen below should appear if your account has been setup correctly:
Click “next”, your setup is complete! You should see the screen below: